Showing posts with label recipe. Show all posts

Tuesday, April 5, 2011

Learn to Cook "LEMON SQUARES" with T.Rube

This chick has a crazy attraction to all things food. She loves to eat, for starters. But, even more than eating, she loves to cook. She takes every opportunity to help out in the kitchen; from mixing, to sauteing, to pouring, to cutting, to peeling potatoes and grating cheese. When asked what she wants to be when she gets older, her immediate answer is "an alien chef". Hmmmmm..... not so sure about the alien part....but the chef part... We can accommodate that!

She spends time every day watching cooking shows and has a number of her favourites set on the pvr to watch on demand. It doesn't seem to matter who is cooking; male or female; or what they're cooking; sweets or savouries. It doesn't even have to be something that she likes to eat. Today, she watched an entire half hour of 'cooking with onions', for example.


Yesterday on a PBS show, she watched a woman make Lemon Squares. She loves lemon meringue pudding and lemon yogourt, and asked me if we could make these squares. So, I found the recipe online and shopped for the few ingredients we were missing this morning. And we were set to go....

Lemon Squares


Ingredients

  • For The Crust

    • Non-stick cooking spray
    • 3/4 cup all-purpose flour, (spooned and leveled)
    • 1/3 cup confectioners' sugar, plus 1 tablespoon for sifting
    • 1/4 cup cornstarch
    • 1/4 teaspoon salt
    • 1/2 cup (1 stick) cold unsalted butter, cut into small pieces
  • For The Lemon Filling

    • 4 large eggs
    • 1 cup granulated sugar
    • 2/3 cup fresh lemon juice
    • 1/4 cup all-purpose flour
    • 1/2 teaspoon baking powder
    • 1/2 teaspoon salt

Directions

  1. Preheat oven to 350 degrees, with rack in center. Coat a 9-inch square baking pan with cooking spray; line pan with two crisscrossed rectangles of parchment paper, leaving a 2-inch overhang on all sides.
  2. Make the crust: In a food processor, pulse flour with confectioners’ sugar, cornstarch, and salt. Add butter; pulse until mixture resembles coarse crumbs. Press into bottom and 3/4 inch up sides of prepared pan. Refrigerate 15 minutes.
  3. Bake until crust is lightly browned 20 minutes. Let cool slightly in pan. Reduce oven heat to 325 degrees.
  4. Meanwhile, make the lemon filling: In a bowl, beat eggs with an electric mixer until thick. Beat in granulated sugar, lemon juice, flour, baking powder, and salt. Pour over warm crust. Bake until set, about 20 minutes. Cool to room temperature; refrigerate about 1 hour.
  5. Using paper overhang as an aid, lift square from pan. Sift remaining tablespoon confectioners' sugar over the top. Cut into 16 squares.

Our cooking class today looked something like this:
We sprayed our pan and lined it with parchment.
T.Rube gets started on the crust by adding the flour to the food processor.
She eyes up the icing sugar and adds the butter before turning the processor on.
T.Rube pats down the crust into the pan before putting it into the oven.
The crust comes out of the oven looking nicely browned.
Now, for the lemon filling...
     
The squares came out of the oven looking awesome! We both wanted to eat these up immediately, but allowed for the cooling down and refrigeration process that this recipe calls for.....
Uhhhh-ohhhhh.... something is not quite right. Not quite right at all.
After removing the squares from the safe confinement of the pan......
Awww...okay, so it's not the happy smiley chef picture that we were hoping for. You know, the one with her holding her perfect Lemon Squares.  I thought they tasted pretty damn good, but T.Rube didn't even much like them.  Not sure what went wrong....  but, clearly, T.Rube will need a better teacher in the kitchen than she has right now.

Sunday, April 3, 2011

How to Make the Perfect Hard-Boiled Egg


There's nothing more frustrating than trying to peel the shell from a sticky hard-boiled egg, where you end up pulling off chunks of egg white and are left holding the yolk in your hand.
And there's so much satisfaction in peeling the perfect hard-boiled egg, where the shell slips off easily, leaving a shiny smooth flawless egg behind.

If you've never experienced a sticky hard-boiled egg it's probably a) because you're doing something right!! or b) because you're using old store-bought eggs; it is fresh eggs that tend to be the challenging ones. Many farmwives keep a carton of old eggs in the back of the fridge that are used specifically for hard-boiling. Other farmwives add vinegar to the water. I didn't find that either of these methods assured me of a perfect hard-boiled egg. And I wanna eat my fresh farm eggs, not eggs that are a few weeks old in the back of the fridge.

Then, I had an egg customer tell me about her grandma's cooking method, and I no longer have sticky eggs, even when using the freshest eggs in the fridge.


Here's my fool-proof method:

Bring the water in a pot to a rolling boil.
Place the eggs gently into the water using a spoon.
Turn the stove element off, but leave the pot on the same burner.
Put the lid on the pot.
and leave for 10-15 minutes.

Rinse the eggs in cold water at this point in order to comfortably handle them.
And start to peel by cracking the center of the bottom rounded part of the egg (rather than the pointy end). There's a bit of an air pocket in there, making it an easy place to start peeling without pulling any white away.

and ....voila....  the perfectly peeled eggs!

Thursday, March 31, 2011

Vietnamese Salad Rolls with Spicy Peanut Sauce

These delicious healthy fresh and crisp salad rolls top the list as one of my favourites!! And, similar to having tacos, they're fun for the family to have, because we can all sit down and pick our own ingredients and wrap them up ourselves.


You'll need a few ingredients from the Asian aisle of your grocery store. These are both common items that are sold in our regular stores, however, and do not require that you go in search of them in Chinatown or other Asian specialty markets.

Find some rice paper. It looks like this.


And some rice vermicelli noodles. They look like this.


You'll want to cook up a square or two of the rice noodles ahead of time to allow them the opportunity to cool down. These salad rolls are a cold dish; thereby explaining the "salad" term in the name.

And then chop up a bunch of ingredients. Traditionally, these rolls contain lots of yummy freshness, including cilantro (I friggin' LOVE cilantro. Almost as much as I LOVE basil, which is another popular ingredient for these wraps. I love them so much I would marry them and the three of us would live happily ever after!), basil, bean sprouts, green onion or chives, shredded cabbage and a bit of cooked cold vermicelli noodle. We also like to occasionally include shredded carrot, cucumber and avocado when we make ours.
We chose to use little shrimps last night, but you can add chicken or pork, or just keep them vegetarian if you prefer.


When you're ready to start rolling, you'll need a big flat bowl of hot water. Place one rice paper into the hot water and let it soften in there for a minute. Have a damp tea towel spread out ready on the table and place the soft (and kinda sticky) rice paper on the towel after pulling it out of the water. Once flattened, start to add a pinch of each of your desired ingredients along the length of the bottom third of your rice paper. Once the filling is in there, you might want to add a bit of sauce to it -  could be a spicy sriracha sauce, a sweet red chili sauce, a hoisin sauce or a spicy peanut sauce. All complement these wraps perfectly!  Then, start to roll up, fold the ends in, and keep them as tight as you can.  The rice paper is nice and sticky, so the roll-up procedure is pretty easy.

Last night, I made a homemade spicy peanut sauce to go with the salad rolls.
I crushed up two fresh cloves of garlic, added 1/2 cup of smooth peanut butter and a 1/2 cup of hot water. I whisked this together until smooth, then added some chopped green onion (you could use garlic chives if you have them on hand),  a 1/4 cup of white wine vinegar, rice vinegar or cider vinegar,  2 tbsp of soy sauce and 2 tsp of cayenne pepper, and mixed it all together until nice and smooth.


This made an addicting, but fairly hot spicy peanut sauce. You can lessen the cayenne if you don't want it quite that spicy.
Add a bit of this sauce to the inside of the roll if you like, too. But it is also delicious to dip your salad roll into, so providing little dipping dishes would be ideal.


DELICIOUS and healthy and easy!! Try 'em!

Friday, March 4, 2011

Kale Chips

i heard it said recently that if you're at a loss what to blog one day, you can always resort to posting a favourite recipe. Well around these parts, my failure to come up with a creative thought or two for you usually results in a post about the history of goat teats or the analysis of a piece of poo. Not a recipe. (and by the way, our goat and Vulva Watch is just fine still. No new updates and not a lot of change. I'll spare you the pictures again today.)

But as I set about making one of my favourite snacks today, I thought I'd share it with you.
I discovered my love of kale chips a year or two ago and it continues to be a favourite around here.

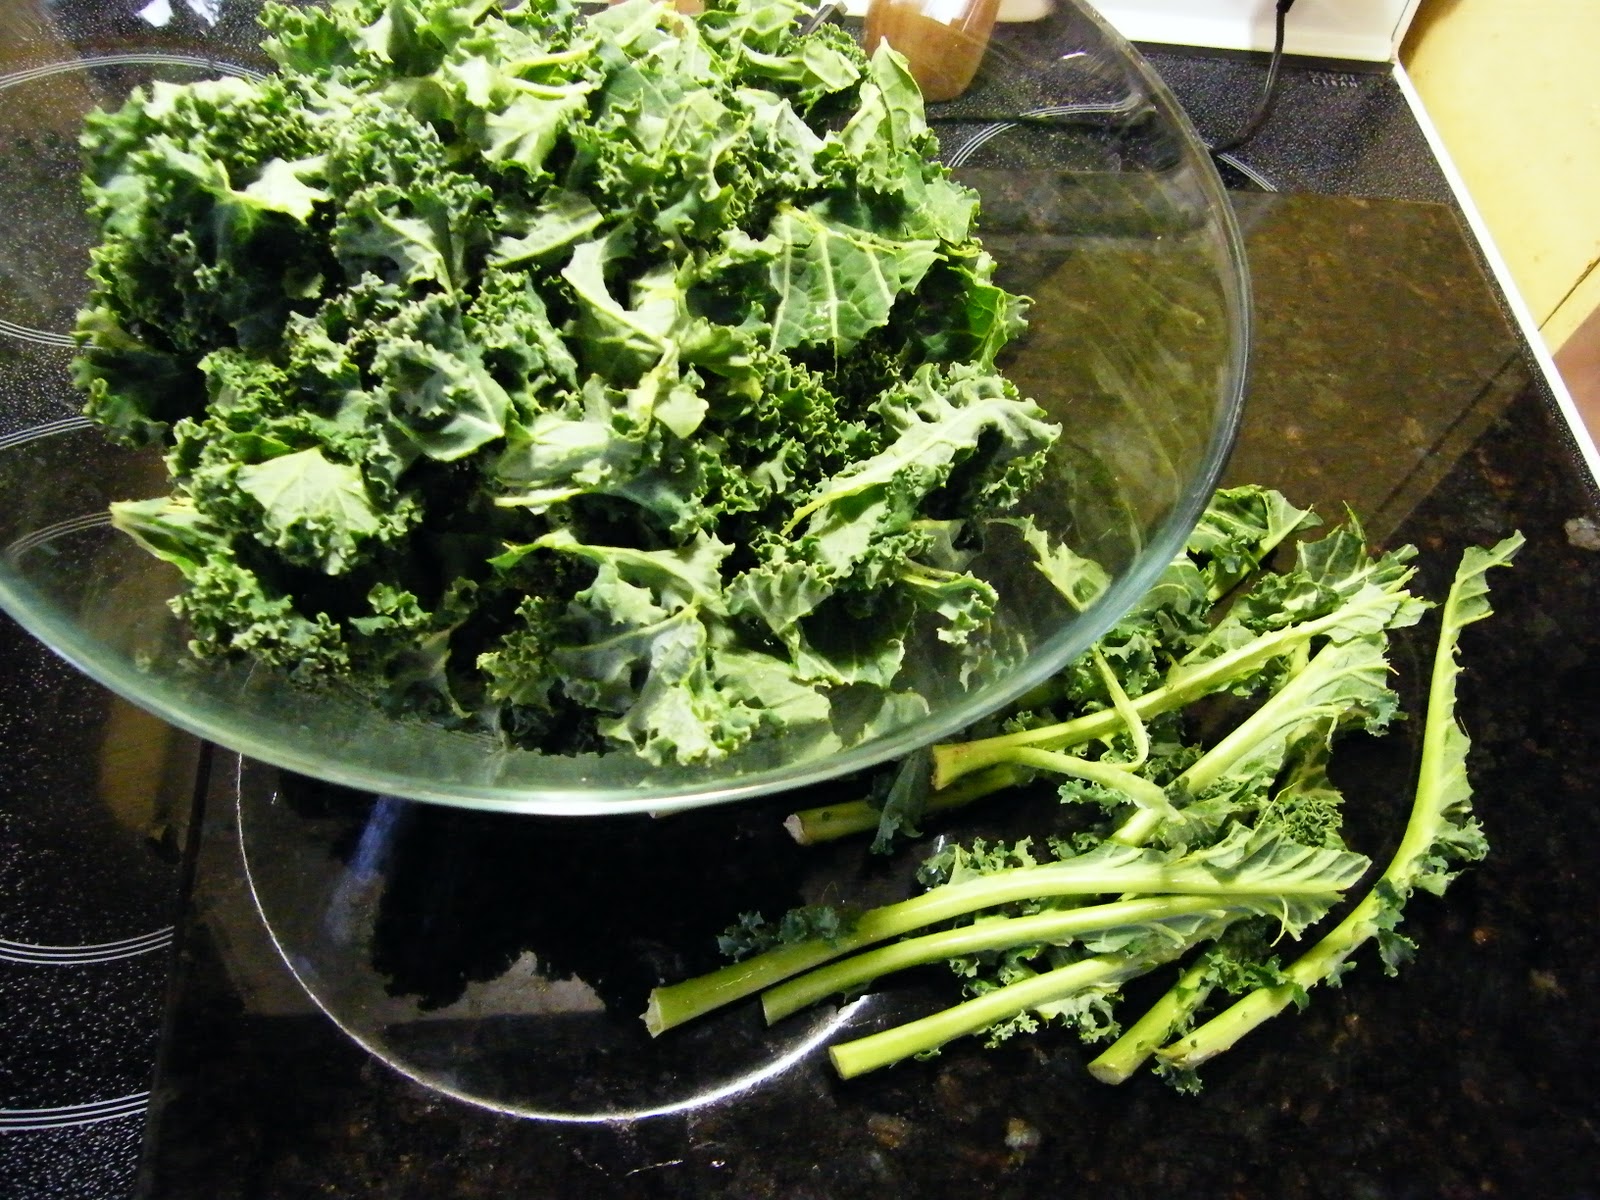
Buy nice curly kale and wash it well.

Break the kale up into chip-sized pieces, avoiding the hard spine of the leaf in the middle.

Toss with a bit of olive oil and salt.

Lay out on a cookie sheet, well spaced.

Pop into a preheated oven at 350 degrees and cook for about 12 minutes. Check often at the end to assure the leaves aren't getting brown. You want to cook it long enough so they remain green but get crispy. Otherwise they will be bitter.

Now i love a product called nutritional yeast. (on popcorn it's awesome too!) You don't have to use this, but it gives the kale chips a nice cheesy taste, and is full of nutritional value for us, like a ton of B vitamins. You can read more about nutritional yeast here. If you choose to use the yeast, sprinkle some on immediately after taking the chips out of the oven.


Scoop into a bowl and this crunchy treat is ready to eat.

"Green chips" are a fave of T.Rube's!


Thursday, August 21, 2008

Butterfly Birthday Baking with J.Rube

Just add your cake mix directly into the cones - about 2/3 of the way up. I didn't add quite enough to mine.

Bake as you normally would bake cupcakes, keeping an eye on them. You should do smaller batches than I did, cuz the ones in the middle of the pan didn't do as well as the ones on the outsides.

Looking good, looking good.....

I mixed up some purple icing. I LOVE this part of the process! Doesn't it look cool?

After icing, I added some candies in the shapes of beautiful butterflies.
"A Rural Rube"and all of its contents are protected by copyright. In order to copy or use any of the entries or photos seen in the blog, please contact me at aruralrube@yahoo.com.
Copyright 2008 A Rural Rube
Powered By Blogger